
____________________________


____________________________
Remote ( Cloud P2P ) Access of DVR over the internet with a PC using Guarding Vision Windows PC Client Software,In this explanation version 2b)–A- , we are following on from having just made available ( Added ) , the DVR for the local LAN viewing way . As noted previously, we don’t need to do have just done that, but this can help simplify the explanation, especially for a first time setting up of the Cloud 2P2 remote way
2b) -A- ______ Following on from previously obtaining LAN local access, and
Adding ( making available ) DVR for remote Cloud use for the first time: DVR is not yet Registered for P2P remote Access
So initially we are still managing and seeing information related to the available standard local LAN Device. In our working example, the particular standard local LAN Device that we have been considering is the DVR connected via a LAN RJ45 Ethernet cable to our router/modem. This device is still showing in the Online Device window.
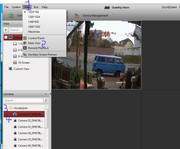
https://i.postimg.cc/yNQGbbVP/Online-Device-window.jpg
( The Online Device window is independent of anything else that we are doing and simply shows and gives various details about any device that is connected to the same router/ modem as the computer running the Guarding Vision Software, and specifically any devices that the Guarding Vision Software recognises as a DVR or any other device which it thinks may be of interest to us. ( You will not necessarily see all other devices such as other computers connected to the same router/ modem ) )
Add a New Device Type of the Cloud P2P type
Our first step is to Add a New Device Type of the Cloud P2P type. Unlike the case of the standard LAN local device type, the Guarding Vision Software does not have one of the Cloud P2P types added by default. I don’t know why that is. I see no obvious reason: All any device type shown in the Device is , is a button on which to call in the process to allow adding a particular device of that type. Never mind
So we follow a similar procedure as for the local LAN device case, to add a new device type, the only difference being that in the dialogue window that pops up, we now check the Cloud P2P Device check box https://i.postimg.cc/mgb3v0sM/Add-Ne...first-time.jpg ( In this example we are assuming that no cloud P2P device type has ever been added, and so the Cloud P2P Device check box would typically not be checked by default )
This last action by us causes a new device type to appear
_#_ Cloud P2P Device ____
But note that at the present time we are still looking at and managing the local LAN connected DVR, https://i.postimg.cc/ZR1FXnbK/but-st...ed-LAN-DVR.jpg
_ Device
________Device Managemant
_Device Type
_#_Device ___________
_#_Upgrade Server _____
_#_ Cloud P2P Device ____
https://i.postimg.cc/xTPqWGgG/Added-...ighlighted.jpg
Attachment 3782
Once again, note that in that last screenshot we see the new Cloud P2P Device Type appear in the left margin device type window , but it is not highlighted, so that at the present time we are still looking at and managing the local LAN connected DVR, https://i.postimg.cc/ZR1FXnbK/but-st...ed-LAN-DVR.jpg
Click on the Cloud P2P Device type to set off….. ….
If we now click on/ select the new Cloud P2P Device Type , you may see for a split second the highlighting in the Device window change to
_ Device
________Device Managemant
_Device Type
_#_Device ___________
_#_Upgrade Server _____
_#_ Cloud P2P Device ____
But that may occur too quickly to see, -. but what should open, and stay open, and fill most of the screen, is a large Login window pop up: What is happening is that the device management is interrupted , because you cannot manage a P2P device without logging in to an authorised account………
https://i.postimg.cc/ryr9x1jd/select...ill-appear.jpg
https://i.postimg.cc/KvF8F0Sb/mcecli...in-country.png
We are now ready for considering the registration of this final , 4th , of the 4 username and password pairs associated with the Sannce DVR using Guarding Vision Software.
( At this point, if you have not already done so, its worth reading the extra notes about this last user name and password which you need to know about, here https://excelfox.com/forum/showthrea...ll=1#post15911 )
Register Sannce P2P AccountFirst Registration of an account for the.. …. Annke Sannce Registered Vision Guarding Vision Cloud P2P App Account User Name and Password by Email Address ….
So, If we now click on/ select the new Cloud P2P Device Type , we will initially see a large Login window pop up
https://i.postimg.cc/ryr9x1jd/select...ill-appear.jpg https://i.postimg.cc/KvF8F0Sb/mcecli...in-country.png
You should select a country, and remember it. It is probably best to always use your country, where the DVR is located. https://i.postimg.cc/SsXfZCpv/select...then-login.jpg ( More on that later ).
Register ( a Annke Sannce Registered Vision Guarding Vision Cloud P2P App Account User Name and Password by Email Address )
Because we are doing this for the first time, and assuming we are new to anything to do with Sannce, we will need at this point not to log in yet, but instead, to register an account as discussed in the last post
Note once again also that we assume that
either
_no other account has made available to Cloud P2P access our DVR
Or
_ if our DVR has been in the past made available to Cloud P2P access using an account, then that account has then at some later date logged in and removed (Deleted) the account so that it is not available at the time that we will make it available.
If our DVR has been in the past made available to Cloud P2P access using an account but has not been removed from availability (Deleted) , this fact will not prevent us registering an account, but it will prevent us using the account ( or any other account ) to make our DVR available to us using Cloud P2P access.
Register and then log in
Having entered the large window , https://i.postimg.cc/KvF8F0Sb/mcecli...in-country.png , select the region where the DVR is
https://i.postimg.cc/SsXfZCpv/select...then-login.jpg
Because this is the first time we are trying to doing anything related to P2P accounts, it is unlikely that we have ever registered an account of the type required, so we ignore the upper logging in part and concentrate on the lower half
https://i.postimg.cc/2StxPbqs/Regist...ount-thing.jpg
https://i.postimg.cc/rmkS57Ym/Lower-...-and-Passw.jpg
You need to add details quickly,
https://i.postimg.cc/8zcHKBCd/Regist...ount-thing.jpg
, and then click on Send Message
__Send Message_
https://i.postimg.cc/MZcZJt6P/Send-M...gistration.jpg
Usually a number code arrives fairly quickly, at the given Email address https://i.postimg.cc/6pBNqhKN/Verifi...com-In-Box.jpg
https://i.postimg.cc/BQT0JVdg/Verifi...com-In-Box.jpg
https://i.postimg.cc/bNcPchFr/Verifi...com-In-Box.jpg
, and this in turn should be quickly typed in, https://i.postimg.cc/902LbJJm/Type-r...in-quickly.jpg , and finally click the Register
_______Register_______
https://i.postimg.cc/W4KKGGBz/All-de...o-Register.jpg
Assuming the registration has gone OK, you can now use the upper part of the login/register window to log in
https://i.postimg.cc/6p8fdktV/Login-after-Register.jpg
https://i.postimg.cc/TPmjsnyp/Login-...upper-half.jpg
You will probably get a warning that you have no resources to import.
https://i.postimg.cc/FR3GbrH2/Loging...-to-import.jpg
That is as expected at this stage. It is because the account has not made any CloudP2P availability yet. – In simple terms, you have done nothing yet with this account, so there is nothing of significance that needs to be done when you log in. ( - We will see later, that it is the act of logging in that, as a by product, makes a connection ( “imports resources to/ for ” ) availability/ possibility into the computer to/ of access via P2P internet remote. What resources/ possibilities your lodging in makes available will depend on what you have previously done using this account, that is to say, depending on what you have done when logged in with this account
The technical processes are not clear of what actually is happening, hence the rather unclear use of wording by me here.
Using Registered account to set up P2P connection
Being logged in with a valid account basically makes it possible to make available to the internet the P2P remote access of a DVR. (Once this has been done with a particular account, then no other account may do the same, until that particular account is used to remove that availability . But you can, on any other computer , on any other running application of the Guarding Vision software , log in with that same particular account ( if you know the user name and password) , and this logging in will automatically make the same availability to you on that other computer where you log in)
As a result of logging in, the Cloud P2P Device _ Type is highlighted, or rather it still is highlighted , since it was highlighted for a split second, as you clicked it/ selected it, ( but which caused the login/ register windows to pop up)
https://i.postimg.cc/cJLmnPkZ/After-...ud-devices.jpg
_ Device
________Device Managemant
_Device Type
_#_Device ___________
_#_Upgrade Server _____
_#_ Cloud P2P Device ____
Because the Cloud P2P Device _ Type is highlighted, we are effectively managing CloudP2P type devices, but nothing is showing yet, as we have done nothing yet.
Also in the Main View, whilst you will see a folder appearing for any account that is , ( or has been at any time ) , logged in , as well as any other devices,
https://i.postimg.cc/dVp7qqtZ/Folders-no-or.jpg
https://i.postimg.cc/43cYyrmL/Folders-no-or.jpg
you will not see any + or – showing to the left of it. – There are no “resources” , that is to say, no cameras in it, nothing to see in it.
Just to clarify: In that last screenshot, we see an entry for the previously added local LAN availability , which we had given the “Nickname” DVR_LAN_BN81BL_F53992124 and we also have a + in order to open that folder to reveal the camera “resources”
We also see both the currently logged in account which we just made, cloudp2pee, and an account that is not logged in which I had logged in with some time previously, cloudygirlp2pssd
Neither of the two Cloud P2P accounts have any Added / made available devices: For our new account, cloudp2pee we have done nothing with it yet, ( and with cloudygirlp2pssd , I had added resources, but then deleted them.
( Having or not having the availability in the Guarding Vision software, that is to say having a devices detail added or not, will determine whether or not the folder has a + or – showing to the left of it. But that does not guarantee that we get pictures displayed. That will depend on whether the DVR has a working connection to
_ the same router/ modem as that which is connected to our computer, for the local LAN devices
or
_ a reliable internet connection of some form, for the Cloud P2P devices. ( In this latter case it does not need to be, but can be, a connection via the same router/ modem as that which is connected to our computer )
So at this stage we don’t see anything yet,…_
https://i.postimg.cc/7Lxqyjsm/Not-ye...ng-by-P2-P.jpg https://i.postimg.cc/fynhbFW3/Not-ye...ng-by-P2-P.jpg
Attachment 3784_... But we are ready now to look at the 3 ways to get the P2P access working to give us pictures
Make Entry for Cloud P2P Device( -A- DVR still LAN connected)
Because we are in explanation version -A- , ( the DVR is still connected in local LAN mode ) the explanations in this post are very similar to the corresponding explanations for the local LAN mode case https://excelfox.com/forum/showthrea...ll=1#post15906
One way to make the necerssary entry is to use the +Add Device button of the large window in which things are written in / Added
That is a fully acceptable way to Add a particular device, but as we have an Online Device showing in the Online Device window below , ( which is the one we want to Add ) , we can take advantage of the ( + Add to Account ) button by the Online Device window to add that device. This way has the advantage of adding one of the details for us:
The dialogue box that comes up for this P2P Cloud case is much simpler than in the local LAN mode case ( https://i.postimg.cc/tTDZ0LvY/Add-a-...ice-Button.jpg https://i.postimg.cc/vZ6V12TN/Add-a-...ent-Button.jpg )
This is the window that comes up from the +Add Device button of the large window
https://i.postimg.cc/RCWPfX18/Add-Device-P2-P.jpg
and this from the using the +Add to Account button in the Online Device Window
https://i.postimg.cc/X7FQ1qzk/Add-To-List-P2-P.jpg
They are much simpler than the corresponding window for the LAN case: I am not sure why that is. I think one reason might be that a lot of information is held and taken in / transferred / “imported” at the time of login***, and for some reason that information is not displayed. Why that information is “hidden” from us I don’t know.
So either of those windows need some information, specifically it’s the effective second user name and password pair which we discussed many times, such as here: https://excelfox.com/forum/showthrea...ll=1#post16050
As discussed previously, the effective Username ( Serial No. ) is the serial number, SN, seen on a small label on the underside the DVR, and the effective password ( Verification Code ) we set on the initial use of the DVR and monitor set up, . This can also be re seen or changed via a right click of the DVR mouse to reveal the settings on the Monitor
https://i.postimg.cc/9fvcjVT2/Right-...ed-checked.jpg
https://i.postimg.cc/mkkjNxXc/Sannce...ation-Code.png
https://i.postimg.cc/yx2mmD35/Right-...ed-checked.jpg ………
_..... From our previous discussions: ....................... The next screenshot window is associated in a rather unobvious , cumbersome, indirect war to the important “remote P2P Cloud access pair” of user name and password
( The effective user name is not shown – that is the serial number typically on a sticker on the underside of the DVR. I gave the example for one of my DVRs as F53992124 )
The effective password for remote access is what is often referred to as the “Verification Code”, as shown in the screenshots:
https://i.postimg.cc/RVBhfgG2/21-Verification-Code.jpg https://i.postimg.cc/zDW3Vswn/22-Ver...e-to-terms.jpg https://i.postimg.cc/SRWK39QZ/23-Verification-Code.jpg https://i.postimg.cc/Gt02XKR8/24-Ver...de-Sannce2.jpg
In those last screenshots I have personally chosen the password of Sannce2. That is just my personal choice. It is a character combination that has reliably and consistently worked for me as the “verification code”. You may try a different character combinations as you wish. But make sure you keep a note somewhere of both the serial number and the verification code.
( Sometimes this “Verification Code” might be referred to as the “Sannce Home Verification Code” - But that can confuse by being mixed up with another user name an password pair which we have not yet discussed, the “ Annke Sannce Registered Vision Guarding Vision Cloud P2P App Account User Name and Password by Email Address “ )
Following my worked example, my “remote P2P Cloud access pair” of user name and password which we will need later is, based on those last screenshots:
F53992124
Sannce2
, where as explained , the F53992124 is the serial number, SN, taken from a sticker on the underneath of the actual DVR that I have been using in the course of preparing these notes ………………………._
So , for the example I have been working through, we need to write in either of those pop up dialogue boxes
F53992124
Sannce2
https://i.postimg.cc/9z3wqWPW/Second...sword-pair.jpg
https://i.postimg.cc/B6VK45XP/Second...sword-pair.jpg
Some processing seems to be being done,
https://i.postimg.cc/RhJnF3Hs/Second...Processing.jpg , and I think this is storing something in the account in some remote place , since when its finished we only see the basic information: https://i.postimg.cc/3rztZmnw/Added-P2-P-Device.jpg
At this stage, my Guarding Vision Software on my computer would appear to ready to do remote P2P viewing. We know that our DVR is online, and we appear to have Guarding vision ready and set up
Common Sense, “Gesunder Menschenverstand” , tells us we are finished now. But we are not
https://i.postimg.cc/dth0RDJs/Common...d-I-am-not.jpg
Attachment 3766
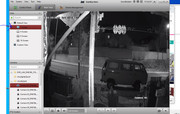
https://i.postimg.cc/05WQJ7RX/Not-Quite-finished.jpg https://i.postimg.cc/rF7wfcpS/Not-Quite-finished.jpg
In that last screenshot, the working picture is coming from the LAN local device, ( which we previously chose to name DVR_DN81BL_F53992124
Not quite finished yet….
If we were now to take a look at the Main View we would still not see any + , ( or - ) alongside the folder of our current logged in user, cloudp2Pee , https://i.postimg.cc/2yKSRN7N/No-or-by-cloudp2pee.jpg https://i.postimg.cc/FzRHBHcx/No-or-by-cloudp2pee.jpg , and we cannot get any remote access. - It is not working yet!! :- If we select the folder named cloudp2pee and hit the refresh/restart symbol, https://i.postimg.cc/wv9vDVjZ/Click-...cloudp2pee.jpg , we will get a blank screen!! https://i.postimg.cc/cHTJhnKH/Click-...et-nothing.jpg
Attachment 3767
At this stage nobody , at least nobody at the time of me writing this, understands what the problem is. I do,….
To summarise the situation as it now stands, regarding P2P Cloud remote access. ( after Adding successfully a Cloud P2P Device. )
_...see next post
To summarise the situation as it now stands, regarding P2P Cloud remote access. ( after Adding successfully a particular Cloud P2P Device (cloudp2pee ). )
( Logout - Login oddity. Missing piece in the puzzle)
In the way of doing it ( -A- ) , at this stage of our worked example, we appear to have a picture showing on our computer taken from a camera which is connected to the DVR. But, important is to note that this is working by the local LAN way: If our computer was not connected to the same router/modem as our DVR, then the screen would then go blank, ( at the next refresh/restart )
Similarly, as we showed at the end of the last post , if we try to access the picture via selecting the recently added folders in the Main View Explorer window , then we end up with a blank screen, https://i.postimg.cc/cHTJhnKH/Click-...et-nothing.jpg
However , we have done correctly and fully and successfully all we can and all we need to do get the remote cloud P2P way working
So what’s the problem?
It would appear that a registered P2P account with Sannce, ( in our worked example that with the user name of cloudp2pee ) , exists to hold information for, and to act as a form of authorisation to, access one or more DVRs remotely over the internet . Necessarily this registered P2P account with Sannce also needs to be able to collect the necessary details of the DVR which are required to allow the P2P access. Whether by design, personal choice ( of Sannce ) , or for reasons of security, most of this information is not see able, ( at least not in any easy way that I know about. . – there may be some advanced settings that, at the time of me writing this, I do not know about.). So far I have not seen a “button” or any other way to evoke the “bringing in” , or “setting up with” or “using” of this information in such a way that things start working as we want them to , or as they need to in order to get the functioning P2P remote internet access.
This is a dilemma. My guess is that not just me, but the entire technical people at Sannce have been in this dilemma, and never consciously got out of it. I will further guess, that like me, anyone that ever got this functioning P2P remote internet access had spent many frustrating hours trying, and then at some point, a random combination of events resulted in it working.
So two possible solutions
Solution 1 – This was the only known solution until I figured out solution 2.
Keep experimenting and one day you will be lucky and it will start working.
Solution 2 – I figured out that the necessary action which we are missing is referred to as something like “importing”. The software is written to carry out this importing when a valid account is logged in. ( But note , that the account must have stored somewhere, (probably at Sannce somewhere), the information .
Currently we are at the situation where the account with user name cloudp2pee holds information for, and has authorisation to, access our DVR remotely over the internet. )
All we need to do is log in with the account. But we can’t, as we are already are logged in!
So, the final solution , the last missing piece in the puzzle…… Log out , and then re log in!
(Logout and) Login with Sannce P2P account to importAt the point where we are in this worked example, we are logged in with a Sannce P2P account with user name cloudp2pee which holds information for, and has authorisation to, access our DVR remotely over the internet.
In Main View we see this:
https://i.postimg.cc/QCyJmWD3/Main-V...ore-logout.jpg
Attachment 3768
, and in Device Management we see this.
https://i.postimg.cc/fyLvYf6C/Device...ore-logout.jpg
Now we logout, https://i.postimg.cc/xCgRk4Fq/Logout...Management.jpg
Because we have the Cloud P2P Device selected, we are returned to the large Sannce P2P cloud login window
https://i.postimg.cc/XJnLYbLT/Logout...e-selected.jpg , so then we re login https://i.postimg.cc/136LjDzM/Re-login.jpg . Typically the last username used would be remembered and written in already, https://i.postimg.cc/sDbkmT3v/Re-log...count-used.jpg . Note that we are only interested in logging in, - the registration no longer concerns us, so we ignore the Register button, https://i.postimg.cc/NFzWW4TC/Re-log...logging-in.jpg
We enter the password, and hit login, https://i.postimg.cc/KcpSkZV7/Enter-...hen-Log-in.jpg
Some processing appears to be happening, https://i.postimg.cc/Yq4cQ5K5/Some-p...ng-is-done.jpg , and then note that typically , if all has gone well, a small black window pops up for a second to inform that “Importing succeeded” https://i.postimg.cc/kG401ZVt/Import...ack-window.jpg
Now, in Device Management we see the same as we did just before logging out.
https://i.postimg.cc/vBs1R7Mz/Device...r-re-login.jpg
But the first thing we notice new in Main View is that we now have a + appearing to the left of the folder corresponding to the P2P account name , cloudp2pee https://i.postimg.cc/N0TyPChF/appear...-P-account.jpg
If we then
either
_ hit the restart/refresh symbol, https://i.postimg.cc/MTmnzcp8/Hit-cy...-P-account.jpg
or
_ click on that + ,to reveal the camera “resources” in a drop down list, and then double click on the first camera listed, https://i.postimg.cc/kgL6s3pL/Hit-th...-P-account.jpg
, then we now see the picture.
( In this worked example, I just have one camera connected, and so it is best to select the single screen, 1-Screen view , since no attempt is then made to cycle through different cameras, and this proves in the practice to give a more stable picture )
https://i.postimg.cc/jdwJ7S8y/1-Screen-View.jpg
Attachment 3769
( Currently we still have our computer connected to the same router/ modem as the DVR, but that is just because of how I have organised and developed all of the explanations so far. I could now disconnect the computer from my router/modem, and go to any remote location, and then, as long as I connect my computer to the internet , ( anywhere in the world ), I should still see the same picture, because I am accessing the DVR over the internet. )
So finally we have finished the main purpose of this Blog.
We progressed by firstly obtaining a working local LAN access to the DVR. But that was not necessary. So in the next posts, we explain how to obtain a working remote P2P access of the DVR , starting at a remote location , with a fresh installation of the Guarding Vision Software. We will not concern ourselves with a working local LAN access to the DVR.
Page 4 https://excelfox.com/forum/showthrea...Software/page4 https://excelfox.com/forum/showthread.php/2769-P2P-Cloud-DVR-remote-Access-via-a-(remote)-PC-Using-Guarding-Vision-PC-Client-Software/page4
Post # 31 https://excelfox.com/forum/showthrea...ll=1#post15917 https://excelfox.com/forum/showthread.php/2769-P2P-Cloud-DVR-remote-Access-via-a-(remote)-PC-Using-Guarding-Vision-PC-Client-Software?p=15917&viewfull=1#post15917
[Righthttps://excelfox.com/forum/showthread.php/2769-P2P-Cloud-DVR-remote-Access-via-a-(remote)-PC-Using-Guarding-Vision-PC-Client-Software?p=15917#post15917] https://excelfox.com/forum/showthread.php/2769-P2P-Cloud-DVR-remote-Access-via-a-(remote)-PC-Using-Guarding-Vision-PC-Client-Software?p=15917#post15917 [/Right]
-AB- Notes in preparation for full remote Cloud P2P DVR access , Installing, Setting up and using at remote location. ( No direct Access to DVR )
These two different scenarios correspond to the two next posts,
-B- Cloud P2P remote access if you know the password and username of Sannce registered account holding DVR P2P relevant information
https://excelfox.com/forum/showthrea...ll=1#post15902
-C- Cloud P2P remote access if no Sannce registered account holds DVR information
https://excelfox.com/forum/showthrea...ll=1#post15919
_.______________________
Obtaining remote access to DVR over the world wide web internet
Whilst it is possible to obtain over the internet access to a DVR at a remote location after installing the Guarding Vision Software for the first time, certain things will have needed to have been done previously and certain things will need to be known.
These things will not always be explained in full detail in this and following posts. They are described in detail in the previous posts, and it is advisable to read through those previous posts in order to get a full picture and understanding of the basic use of the Sannce DVR with Guarding Vision PC client software.
The DVR must be connected to the internet, - it must be “OnLine”
This is required for both -B- and -C-
DVR Enabled and password ( Verification code ) and username ( Serial No. , SN)
Initially in the first DVR set up using a mouse and monitor, or at a later date via the settings using the mouse and monitor, in the Network settings a box labelled Enable must be checked, and underneath this is a Verification Code needs to have been set.
In addition for -C- you must know this Verification Code
https://i.postimg.cc/yNN0d4bG/Enable...ation-Code.jpg
For -C-, you also need to know the 9 character serial number which is typically on a label or sticker on the underside of the DVR. Typically the first character is an upper case letter, and the other 8 characters are numbers.
The serial number and the verification code are those which I have referred to throughout my previous post explanations as a second required username and password pair. In some literature these two things are simply referred to by the serial number and verification code, or Sannce Home verification code.
These two things need to be known as they will need to be filled in at a certain stage in a window that pops up when performing a so called Adding action: https://i.postimg.cc/9z3wqWPW/Second...sword-pair.jpg
In all the working examples I have discussed so far, I used the following pair. ( The password/ verification code I chose and set myself , but the serial number I cannot chose – I noted it from the underside of the DVR that I have been using )
F53992124
Sannce2
( https://i.postimg.cc/B6VK45XP/Second...sword-pair.jpg )
Sannce Registered P2P account ( Annke Sannce Registered Vision Guarding Vision Cloud P2P App Account User Name and Password by Email Addres
https://excelfox.com/forum/showthrea...ll=1#post15913 )
Information necessary for successful setting up of the Cloud P2P, and/ or its subsequent use, is held somewhere remotely by Sannce. It can only be held by a single account at any time.
So ether
_ (For -B- ) You need to know the username and password of such an account if it exists and it has the information. ( The information and various setting up will be done automatically when you do a necessary logging in.)
or
_ ( For -C- ) If you know that no account is holding this information, you will have to register such an account, and use that.
These two different scenarios correspond to the two next posts,
-B- Cloud P2P remote access if you know the password and username of Sannce registered account holding DVR P2P relevant information
https://excelfox.com/forum/showthrea...ll=1#post15902
-C- Cloud P2P remote access if no Sannce registered account holds DVR information
https://excelfox.com/forum/showthrea...ll=1#post15919
In both the cases, I will assume that the Guarding Vision Software needs to be installed for the first time, but the installation will only be briefly explained
( full details: .exe installation File: https://excelfox.com/forum/showthrea...ll=1#post15901 ;
Installation: https://excelfox.com/forum/showthrea...ll=1#post15902
First use : https://excelfox.com/forum/showthrea...ll=1#post15901 )
-B- Cloud P2P remote access if you know the password and username of Sannce registered account holding DVR P2P relevant information
For this demonstration and explanation , my DVR is at home and is connected to the internet. My computer is away from home and connected to the internet. There is no connection through any cable or local wireless network or any other network that allows any sort of direct or indirect connection between my computer and the DVR, ( other than the world wide web internet to which they are both connected)
On the computer is no installed Guarding Vision PC Client Software.
As a result of the various work detailed in the previous posts of this blog, we have a P2P account registered at Sannce. We had used that previously to obtain successful viewing of the cameras connected to the DVR via the Cloud P2P way. At this stage I have done nothing to remove anything from that account.
The account username and password are
cloudp2pee
CloudP2P.!*
I downloaded and made a fresh install of the Guarding Vision Software.
( full details: .exe installation File: https://excelfox.com/forum/showthrea...ll=1#post15901 ;
Installation: https://excelfox.com/forum/showthrea...ll=1#post15902
First use : https://excelfox.com/forum/showthrea...ll=1#post15901 )
After the successful installation a Guarding Vision desktop icon appeared on my computer’s desktop.
I double click on the Guarding Vision desktop icon , and as expected, I am asked on the first opening to give a “Super User” username and a password. This password is only required for further running/ opening of the Guarding Vision, and can be anything, but for the sake of simplicity I will use the same as in all previous working examples
DocAElstein
Gaudy.!*
After logging in , ( and cancelling any offered help window) , I am left with the basic Guarding Vision PC Client Software user interface.
By default, Device Management is showing a single simple ( local ) Device, - that showing with background highlighted in brown https://i.postimg.cc/0NH658DZ/Device-for-managemant.jpg
https://i.postimg.cc/qv94b9Gz/LTE-Ser-Sszu-D-1-snip.jpg
https://i.postimg.cc/cLKdcswp/LTE-Ser-Sszu-D-1.jpg
_ Device
_#_Control Panel______Device Management_
_Device Type______________
_#_Device _____________
_ _#_Upgrade Server _____
__+_Add New Device Type ___
On opening this ( local LAN Type ) # Device is typically the only default + Added device. The software and technology behind this is for simple local connection. This device is no use to us, because our DVR is not connected locally – it’s not connected to the same router or modem to which our computer is: I am away from home at a remote location, which might be anywhere in the world. My DVR is still at home, and is connected to my home router/modem via a LAN RJ45 Ethernet cable.
We need a type that has the ability to do the P2P remote stuff, since we need this P2P technology to get access to our DVR across the internet ( https://www.encyclopedia.com/economi...technology-p2p )
Note also that no online device is showing: The Online Device window is designed to search for ,and show, any locally connected devices such as DVRs which we can then use via a simple local connection
So we need to add a new device type: https://i.postimg.cc/L4yydWyT/Add-New-Device.jpg
We need and so check the Cloud P2P Device , https://i.postimg.cc/PJq2pbqY/Add-New-Device.jpg
After doing this the new Device type appears available to us in Device type window, https://i.postimg.cc/jdmZ27Yn/new-de...ype-window.jpg , but it is not selected – ( so we are still managing the simple device type , and so the large window remains empty , https://i.postimg.cc/4yKpRWdL/Still-...-have-none.jpg )
So we select the newly added Cloud P2P Device type, https://i.postimg.cc/6q1zd77S/select...evice-type.jpg .
The act of selecting / clicking the Cloud P2P Device button in the device type window is to evoke a large Sannce cloud login window, and the first thing we must do is select the land associated with our DVR, - in my case Germany , https://i.postimg.cc/MKv9zYN8/Select...fore-login.jpg , then login , https://i.postimg.cc/GpkMZhN8/login-...ct-country.jpg .
Hitting login evokes the Sannce Login / Register window, https://i.postimg.cc/Zqk77yfz/Sannce...ter-window.jpg . We are only interested in the upper login half, https://i.postimg.cc/HshPMNXx/only-i...ter-window.jpg , since we are wanting to use our already registered Sannce account, cloudp2pee
cloudp2pee
Cloud2P2.!*
We add that password and username details of our already registered account, and login , https://i.postimg.cc/7Y6Wf4Cd/Add-de...-and-login.jpg
We should then see some Processing … going on, https://i.postimg.cc/x8R87HGx/Some-p...ng-is-done.jpg , which may take a few seconds since it is attempting to access information held by Sannce. If this “Importing” is successful then we will see our device appearing in the large window which is now managing Cloud P2P devices https://i.postimg.cc/jjrcQY5s/Succes...cloudp2pee.jpg
We are finished now, and we should be able to access our DVR via the Main View window,
https://i.postimg.cc/NMBNYvqN/main-v...cloudp2pee.jpg
Attachment 3771
https://i.postimg.cc/nh9SG1G1/1-came...cloudp2pee.jpg https://i.postimg.cc/rmjfwZqq/1-came...cloudp2pee.jpg https://i.postimg.cc/9X1km0fy/1-came...cloudp2pee.jpg
Attachment 3770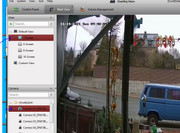
-C- Cloud P2P remote access if no Sannce registered account holds DVR information
Possible Problem! Need to remove details of DVR from Sannce registered devices
For this demonstration and explanation , my DVR is at home and is connected to the internet. My computer is away from home and connected to the internet. There is no connection through any cable or local wireless network or any other network that allows any sort of direct or indirect connection between my computer and the DVR, ( other than the world wide web internet to which they are both connected)
On the computer is no installed Guarding Vision PC Client Software.
Possible Problem! Need to remove details of DVR from Sannce registered devices
As a result of the various work detailed in the previous posts of this blog, we have a P2P account registered at Sannce. We had used that previously to obtain successful viewing of the cameras connected to the DVR via the Cloud P2P way. At this stage I have done nothing to remove anything from that account.
The account username and password are
cloudp2pee
CloudP2P.!*
This gives us a problem: Many accounts may be registered and any account could Add / register the DVR to make it available at Sannce for the P2P remoter access. But, at any one time only one account may have done this Adding / registering.
( If you logged in with a valid Sannce P2P account, but tried to Add a device which another account had Added already, then you would get an error https://i.postimg.cc/65y1rbFy/Adding...-by-others.jpg )
You could consider this phenomena as if the account “owned the rights” to the use of the DVR via P2P remote access. It is similar to the idea of the account having the Copyright to such use, or the sole legal right to determine such use.
We overcome the problem by using these “rights” to effectively remove that right, or in other words to give up the ownership rights.
Remove an accounts Device information.
This can be done very simply from the Guarding Vision Software through the Device ManagementYou must be logged in to the relevant account, and the act of logging in should automatically import the devices it “owns”. That is to say the devices which had been Added / in order to make the DVR available at Sannce for the P2P remoter access.
________Device Management
So, first , we must log in with the account on any computer anywhere that is
_ running the Guarding Vision software
and
_ the computer must be connected to the internet, ( since the information we want to remove from the account is held by Sannce at some remote place )
Then in Device Management , we select the actual device and then hit the Delete button
https://i.postimg.cc/h45qRmBQ/Delete...-Add-ed-it.jpg
https://i.postimg.cc/sxqFYkc4/Delete...-Add-ed-it.jpg
If the deleting was successful then afterwards you will no longer see the entry in the Device Management window
https ://i.postimg.cc/j2L0Jxzj/Deleted-an-Add-ed-device-using-the-Sannce-account-that-Add-ed-it.jpg
( If that account had only stored the details of that one DVR, then we would be warned on logging in on any other occasion that the account had no “resources” https://i.postimg.cc/xCsVCJN7/After-...to-be-impo.jpg )
We can now proceed with the main part of this final blog section, Cloud P2P remote access if no Sannce registered account holds DVR information.
_.... see next post
Cloud P2P remote access if no Sannce registered account holds DVR information.Prepare Sannce account registering details.
As discussed in detail here, https://excelfox.com/forum/showthrea...ll=1#post15911 , it is wise to have prepared before hand all the details for Sannce P2P account registration.
For the purposes of this demonstration I have prepared a username and password to use, as well as registering a new gmail Email account.
User Name cloudpooh
Password CloudP2P.!*
Confirm Password CloudP2P.!*
Email Address poohessin@gmail.com
I have this information stored at a convenient place so that I can access it quickly when needed, for example in a text file, https://i.postimg.cc/90H2s4Kq/Annke-...-text-file.jpg
Also in this way, -C- , we also need the username/password information which we discussed as coming from the actual DVR serial number, and a Verification Code set via the monitor and mouse in order to “Enable” the DVR for such internet things. These are the values used throughout my previous posts,
F53992124
Sannce2
I keep this data also convenient to hand during the following work, https://i.postimg.cc/xdRzP4jW/Serial...-test-file.jpg
Any previous version of the Guarding Vision software I have de installed for the purposes of the following demonstration and explanations
I downloaded and made a fresh install of the Guarding Vision Software.
( full details: .exe installation File: https://excelfox.com/forum/showthrea...ll=1#post15901 ;
Installation: https://excelfox.com/forum/showthrea...ll=1#post15902
First use : https://excelfox.com/forum/showthrea...ll=1#post15901 )
After the successful installation a Guarding Vision desktop icon appeared on my computer’s desktop.
I double click on the Guarding Vision desktop icon , and as expected, I am asked on the first opening to give a “Super User” username and a password. This password is only required for further running/ opening of the Guarding Vision, and can be anything, but for the sake of simplicity I will use the same as in all previous working examples
DocAElstein
Gaudy.!*
After logging in , ( and cancelling any offered help window) , I am left with the basic Guarding Vision PC Client Software user interface.
By default, Device Management is showing a single simple ( local ) Device, - that showing with background highlighted in brown https://i.postimg.cc/0NH658DZ/Device-for-managemant.jpg
https://i.postimg.cc/qv94b9Gz/LTE-Ser-Sszu-D-1-snip.jpg
https://i.postimg.cc/cLKdcswp/LTE-Ser-Sszu-D-1.jpg
_ Device
_#_Control Panel______Device Management_
_Device Type______________
_#_Device _____________
_ _#_Upgrade Server _____
__+_Add New Device Type ___
On opening the Gaurding Vision Software for the first time, this ( local LAN Type ) # Device is typically the only default + Added device. The software and technology behind this is for simple local connection. This device is no use to us, because our DVR is not connected locally – it’s not connected to the same router or modem to which our computer is: I am away from home at a remote location, which might be anywhere in the world. My DVR is still at home, and is connected to my home router/modem via a LAN RJ45 Ethernet cable.
We need a type that has the ability to do the P2P remote stuff, since we need this P2P technology to get access to our DVR across the internet ( https://www.encyclopedia.com/economi...technology-p2p )
Note also that no online device is showing: The Online Device window is designed to search for ,and show, any locally connected devices such as DVRs which we can then use via a simple local connection
So we need to add a new device type: https://i.postimg.cc/L4yydWyT/Add-New-Device.jpg
We need and so check the Cloud P2P Device , https://i.postimg.cc/PJq2pbqY/Add-New-Device.jpg
After doing this the new Device type appears available to us in Device type window, https://i.postimg.cc/jdmZ27Yn/new-de...ype-window.jpg , but it is not selected – ( so we are still managing the simple device type , and so the large window remains empty , https://i.postimg.cc/4yKpRWdL/Still-...-have-none.jpg )
So we select the newly added Cloud P2P Device type, https://i.postimg.cc/6q1zd77S/select...evice-type.jpg .
The act of selecting / clicking the Cloud P2P Device button in the device type window is to evoke a large Sannce cloud login window, and the first thing we must do is select the land associated with our DVR, - in my case Germany , https://i.postimg.cc/MKv9zYN8/Select...fore-login.jpg , then login , https://i.postimg.cc/GpkMZhN8/login-...ct-country.jpg .
Hitting login evokes the Sannce Login / Register window, https://i.postimg.cc/Zqk77yfz/Sannce...ter-window.jpg .
In this post, we need to register an account for the first time, so are initially only interested in the lower half of that Sannce Login / Register window, https://i.postimg.cc/Bbt73Fwn/Lower-...ng-account.jpg
So we hit Register, https://i.postimg.cc/85pny9RW/Regist...ng-account.jpg ,
At this point we should prepare to try and do the registering quickly to improve the chances of success. We should get out details handy to copy from, and it is also a good idea to get Email account that you use open and ready to receive a security verification code that will be sent as part of the registering process.
So we fill in quickly and hit the Send button, https://i.postimg.cc/ydh3Nptf/Add-re...age-button.jpg , which should send a security verification code to the given Email address.
Typically the code arrives very quickly at an Email address, and so be prepared for a message of some form in your in box https://i.postimg.cc/SRWB3CXY/code-a...il-address.jpg https://i.postimg.cc/h4TRXWC4/code-a...il-address.jpg https://i.postimg.cc/zXNZWtMC/code-a...il-address.jpg
The code should be typed in quickly and then hit the Register button quickly https://i.postimg.cc/nzfQpfRj/Wnter-...er-quickly.jpg
A window should appear for a split second saying something like Registration Complete , after which you are returned to the Login/ Registration window, from which you can now use the new account to log in. We are only interested now in the top half of the login/ Register window and we ignore the Register button. We simply fill in our newly made account username and password, and hit the Login button , https://postimg.cc/gallery/JDLXJFT .
Because we have no information in this new account we will be told that there is no resource to be imported in a small black window bottom right, https://i.postimg.cc/Yq7jZ6np/logged...e-imported.jpg .
Because we have no Online Device showing in the Online Device Window, https://i.postimg.cc/85bgcLHd/No-Online-device.jpg , we are restricted to using the + Add Device in the large Device Management Window, https://i.postimg.cc/QtcxbBqV/Restri...ent-window.jpg
You then need to add in the two Fields,
https://i.postimg.cc/ry37wgXk/Fill-i...ation-Code.jpg https://i.postimg.cc/xdRzP4jW/Serial...-test-file.jpg
, and then hit OK, https://i.postimg.cc/c432gY08/Fill-i...de-then-OK.jpg
Some processing may take a few seconds, https://i.postimg.cc/Rhk1xNDk/Proces...ke-a-while.jpg , since its calling up information held somewhere by Sannce.
Usually this will then work as intended, and our device appears, https://i.postimg.cc/NG5WtSnD/Succes...ce-appears.jpg .
It appears to have been a success, but if we go now in to the Main Viewing we don’t seem to see any picture, and note also that although we do see the new Folder for the account cloudpoohpee , there is no + alongside it, so there are no resources, that is to say, no items in any drop down list. This ties up with the previous small black window bottom , https://i.postimg.cc/Yq7jZ6np/logged...e-imported.jpg , which popped up during the very first successful ,.og in with theis account.
But we have done correctly and fully and successfully all we can and all we need to do get the remote cloud P2P way working, So what’s the problem……....._
See next post....
 Posting Permissions

 Reply With Quote
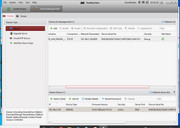


Bookmarks